
How to Make An Obelisk for the Garden
Let me start out by saying I did not come up with this creative idea! I recently watched a video from Garden Answer and it totally inspired me. In the video, Laura makes an obelisk out of willow branches. And just like all of her other videos, she makes it look easy and VERY COOL. Take a look:
Ever since visiting several English gardens in June, I’ve been wanting to make some natural garden supports. Garden Answer’s video was just the stimulus I needed to try my hand at it.
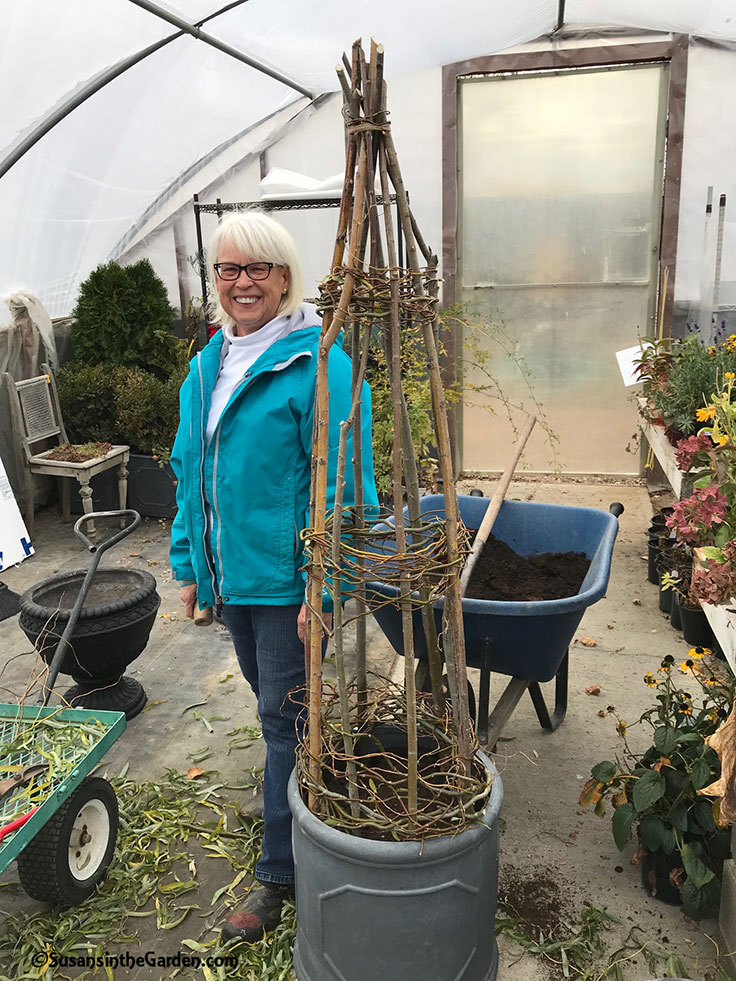
It turns out the video also inspired my dear friend, Carol Newcomb, owner of Northland Rosarium. She was primarily interested in making the obelisks to decorate some large containers for the holidays.
We decided to get together in one of her greenhouses so we could make our own obelisks. But first, each of us wandered through our own landscapes to find suitable materials. In Laura’s video, she uses weeping willow branches and they look terrific.
I was able to gather some red-twig dogwood, aspen saplings, grapevines and thornless blackberry vines. Carol has corkscrew willow and another type of willow tree. Unfortunately, neither of us has a weeping willow tree.
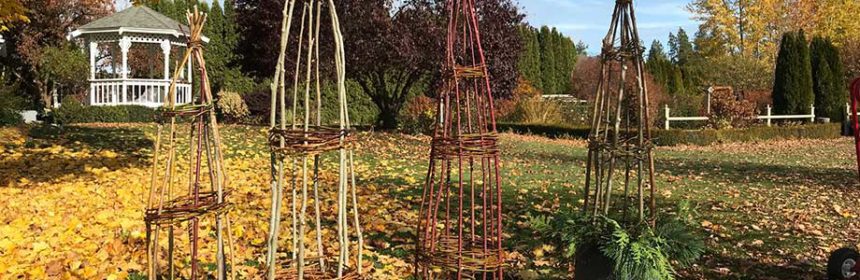
Even so, the materials we had gathered worked out really well. And that is one of the reasons I wanted to write this blog post: to give you ideas on how you might make your own obelisk. That means taking a look to see what types of materials you have in your own garden and give them a try! The possibilities might not be endless, but I’m sure there are even more materials that would work.
(note: you can click on any of the images for a larger view)
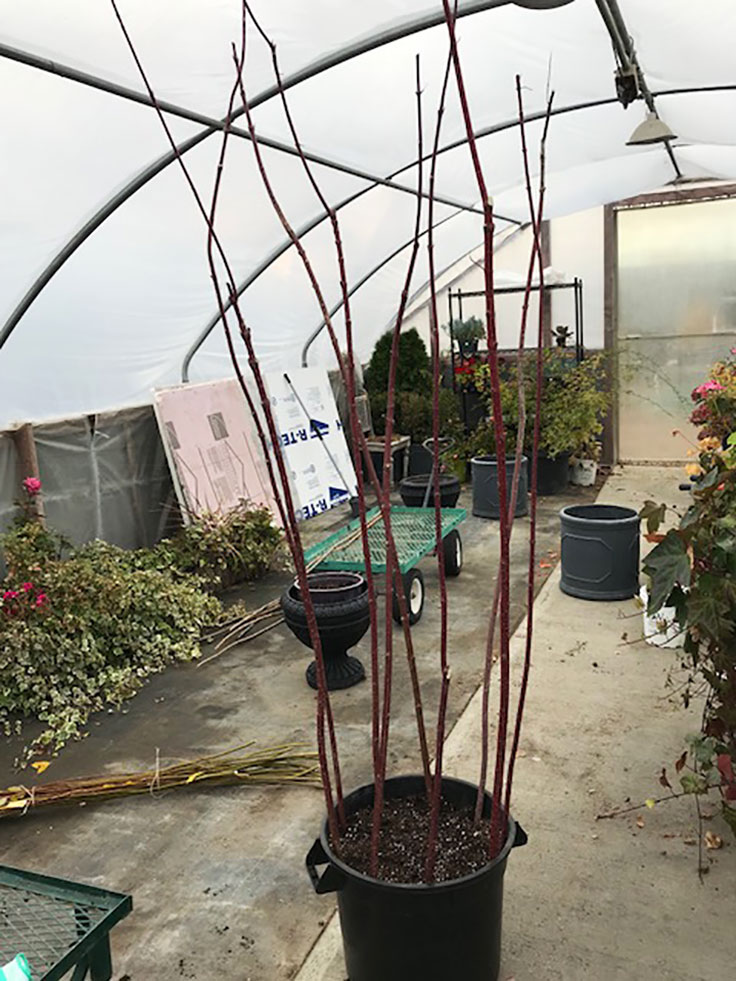
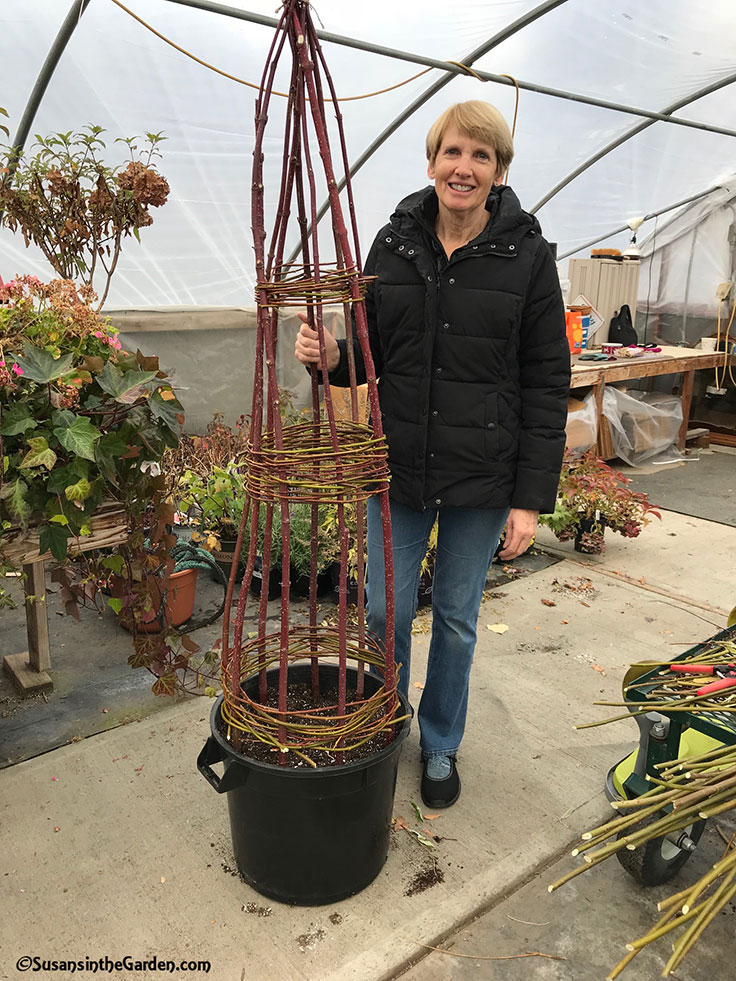
Just like in the video, each of us started with a large pot that had been filled with potting soil. That allows you to stand up the upright branches so they are easy to work on. I used about a dozen red-twig dogwood branches for my first obelisk, with each spaced about 6 inches apart. It’s a good idea to pack the soil around the lower section of the branches, just to keep them from moving around.
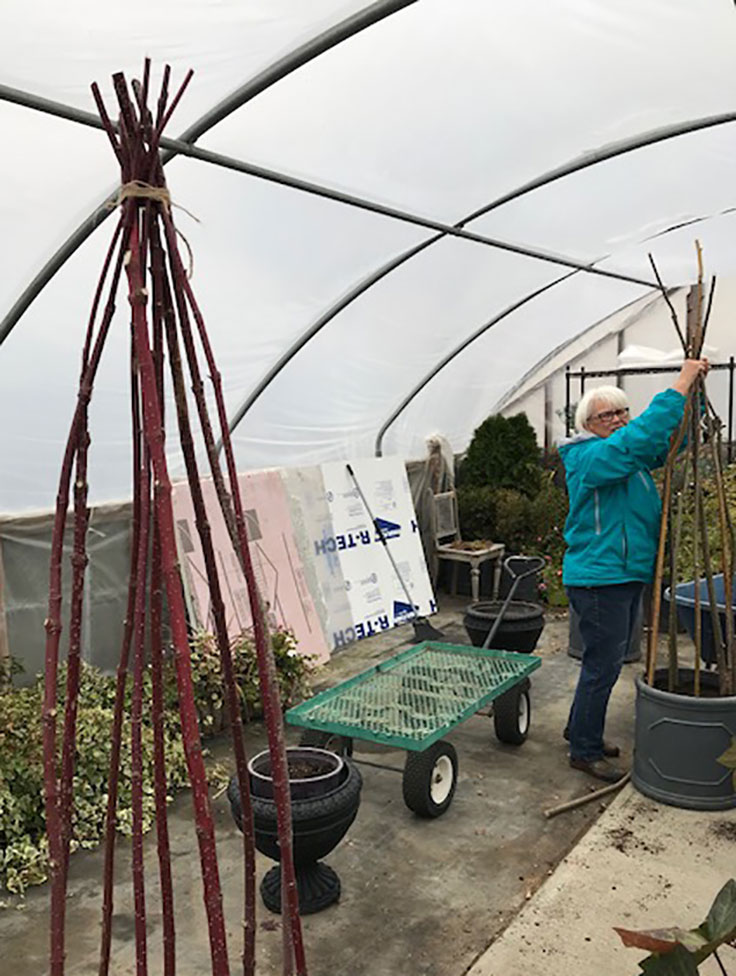
Next, we pulled together the top ends of the branches and used jute twine to tie them together, several inches from the top. (you can later trim the tops down a bit so they are the height you want)
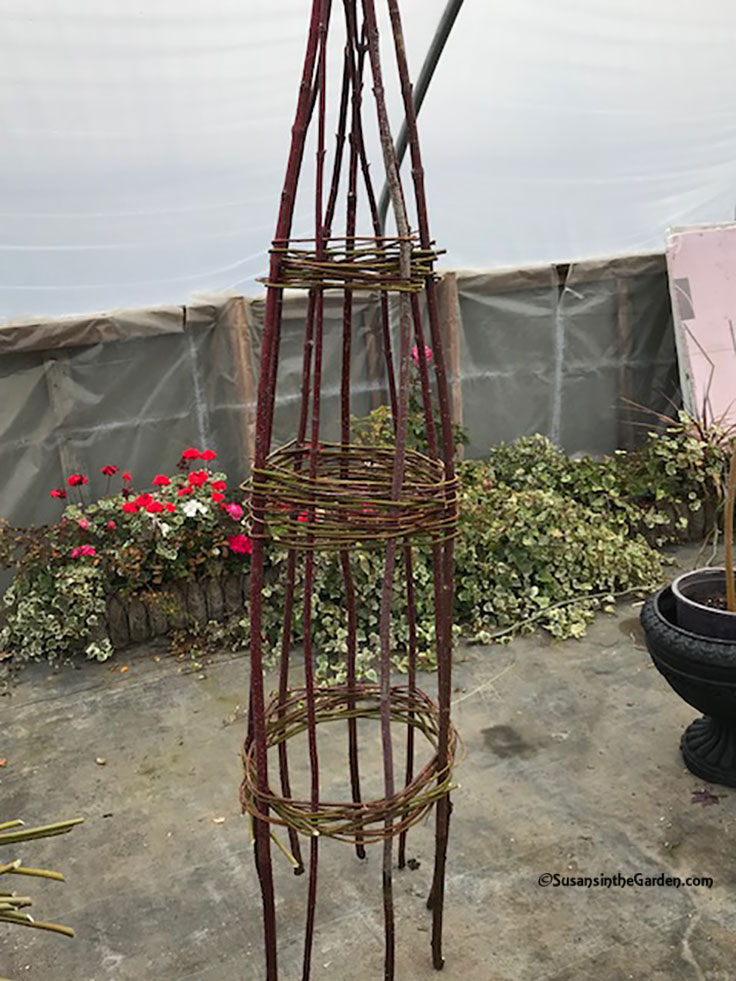
At that point, we each started using thin branches to weave in and out of the upright branches right above the top edge of the pot. Carol and I discovered that, for the weaving part of the project, you really should have materials that are pretty flexible. The blackberry vines, narrow willow branches, corkscrew willow, and grapevines worked well for this. (and the narrower, the better!) As you can see on Carol’s obelisk, she use the corkscrew willows for weaving and they look really cool.
After weaving about 7 layers of branches in between the uprights, we each moved to the middle of the uprights to start weaving in that area. You can weave as many branches as you like but, in general, Carol and I did about 5 to 7 layers.
Then it’s time to move near the top and weave branches again around the uprights. I found it was more challenging to do this top section because the branches are closer together. Because of this, particularly narrow branches or vines work best.
In Laura’s video, she also used small weeping willow vines to cover where she had tied together the tops of the upright branches with jute twine. Carol found the smallest corkscrew willow branches worked great for this. Or perhaps you won’t even feel the need to cover the twine.
Once each of our obelisks were complete, it was time to carefully pull them up out of the pots. To do this, we carefully wiggled each one slowly upward and were amazed at how everything held together. Whew.
Carol and I each made 2 obelisks and we’re so excited about how they turned out that we plan to make more. It didn’t take long to make them (maybe an hour each) and they look pretty cool, if we do say so ourselves.

For one of Carol’s pots, she added in some natural greenery from her garden to see how it would look and decided it would be a great way to kick off the holiday season in some front porch containers. We’re already envisioning some different ways to put the obelisks to use.
What a fun project. Thanks so much, Laura, for inspiring us. And I’m certain we’re not the only ones. Keep those videos coming!