
Starting Tomatoes from Seed
If you live in a northern climate, I hope you haven’t planted your tomatoes from seed yet! Yes, it’s easy to get excited but it’s still too early.
In the past, I used to start my tomato seeds indoors in early February. I figured the plants need to be large and robust before planting them out into the garden in mid-May. I quickly discovered that they’ll grow rapidly indoors. Before you know it, you’ve got leggy plants that flop all over the place. That’s definitely not a good start!
So the following year, I decided to wait a whole two weeks (ha) and see if that made a difference. The result? Floppy, leggy plants.
OK, let’s wait until, gulp, the 1st of March. The result? Yes, still floppy, leggy plants. Darn.
Then I decided to walk on the wild side and wait all the way until the 15th of March. And still I had floppy, leggy plants! Argh.
When will I be starting tomatoes this year?
This year, I am going to try waiting until the first of April. I say “try” because I honestly don’t know if I can wait that long. But it will definitely be after the middle of March.
So what method do I use to start my tomato plants and produce robust plants for the garden?
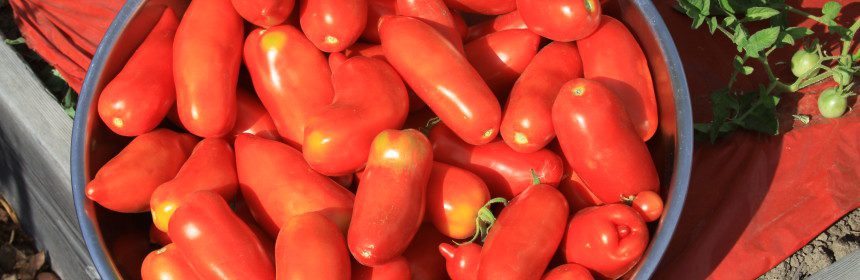
But first, I should probably share my favorite cultivars with you. For slicing tomatoes, you can’t beat ‘Jetstar’. I’m crazy about ‘Sungold’ cherry tomatoes. And my two favorite paste tomatoes are ‘Italian Pompeii’ and ‘Amish Paste – Kapuler’. While there are lots of amazing varieties out there, those are my go-to tomatoes for now.
My routine for starting tomatoes:
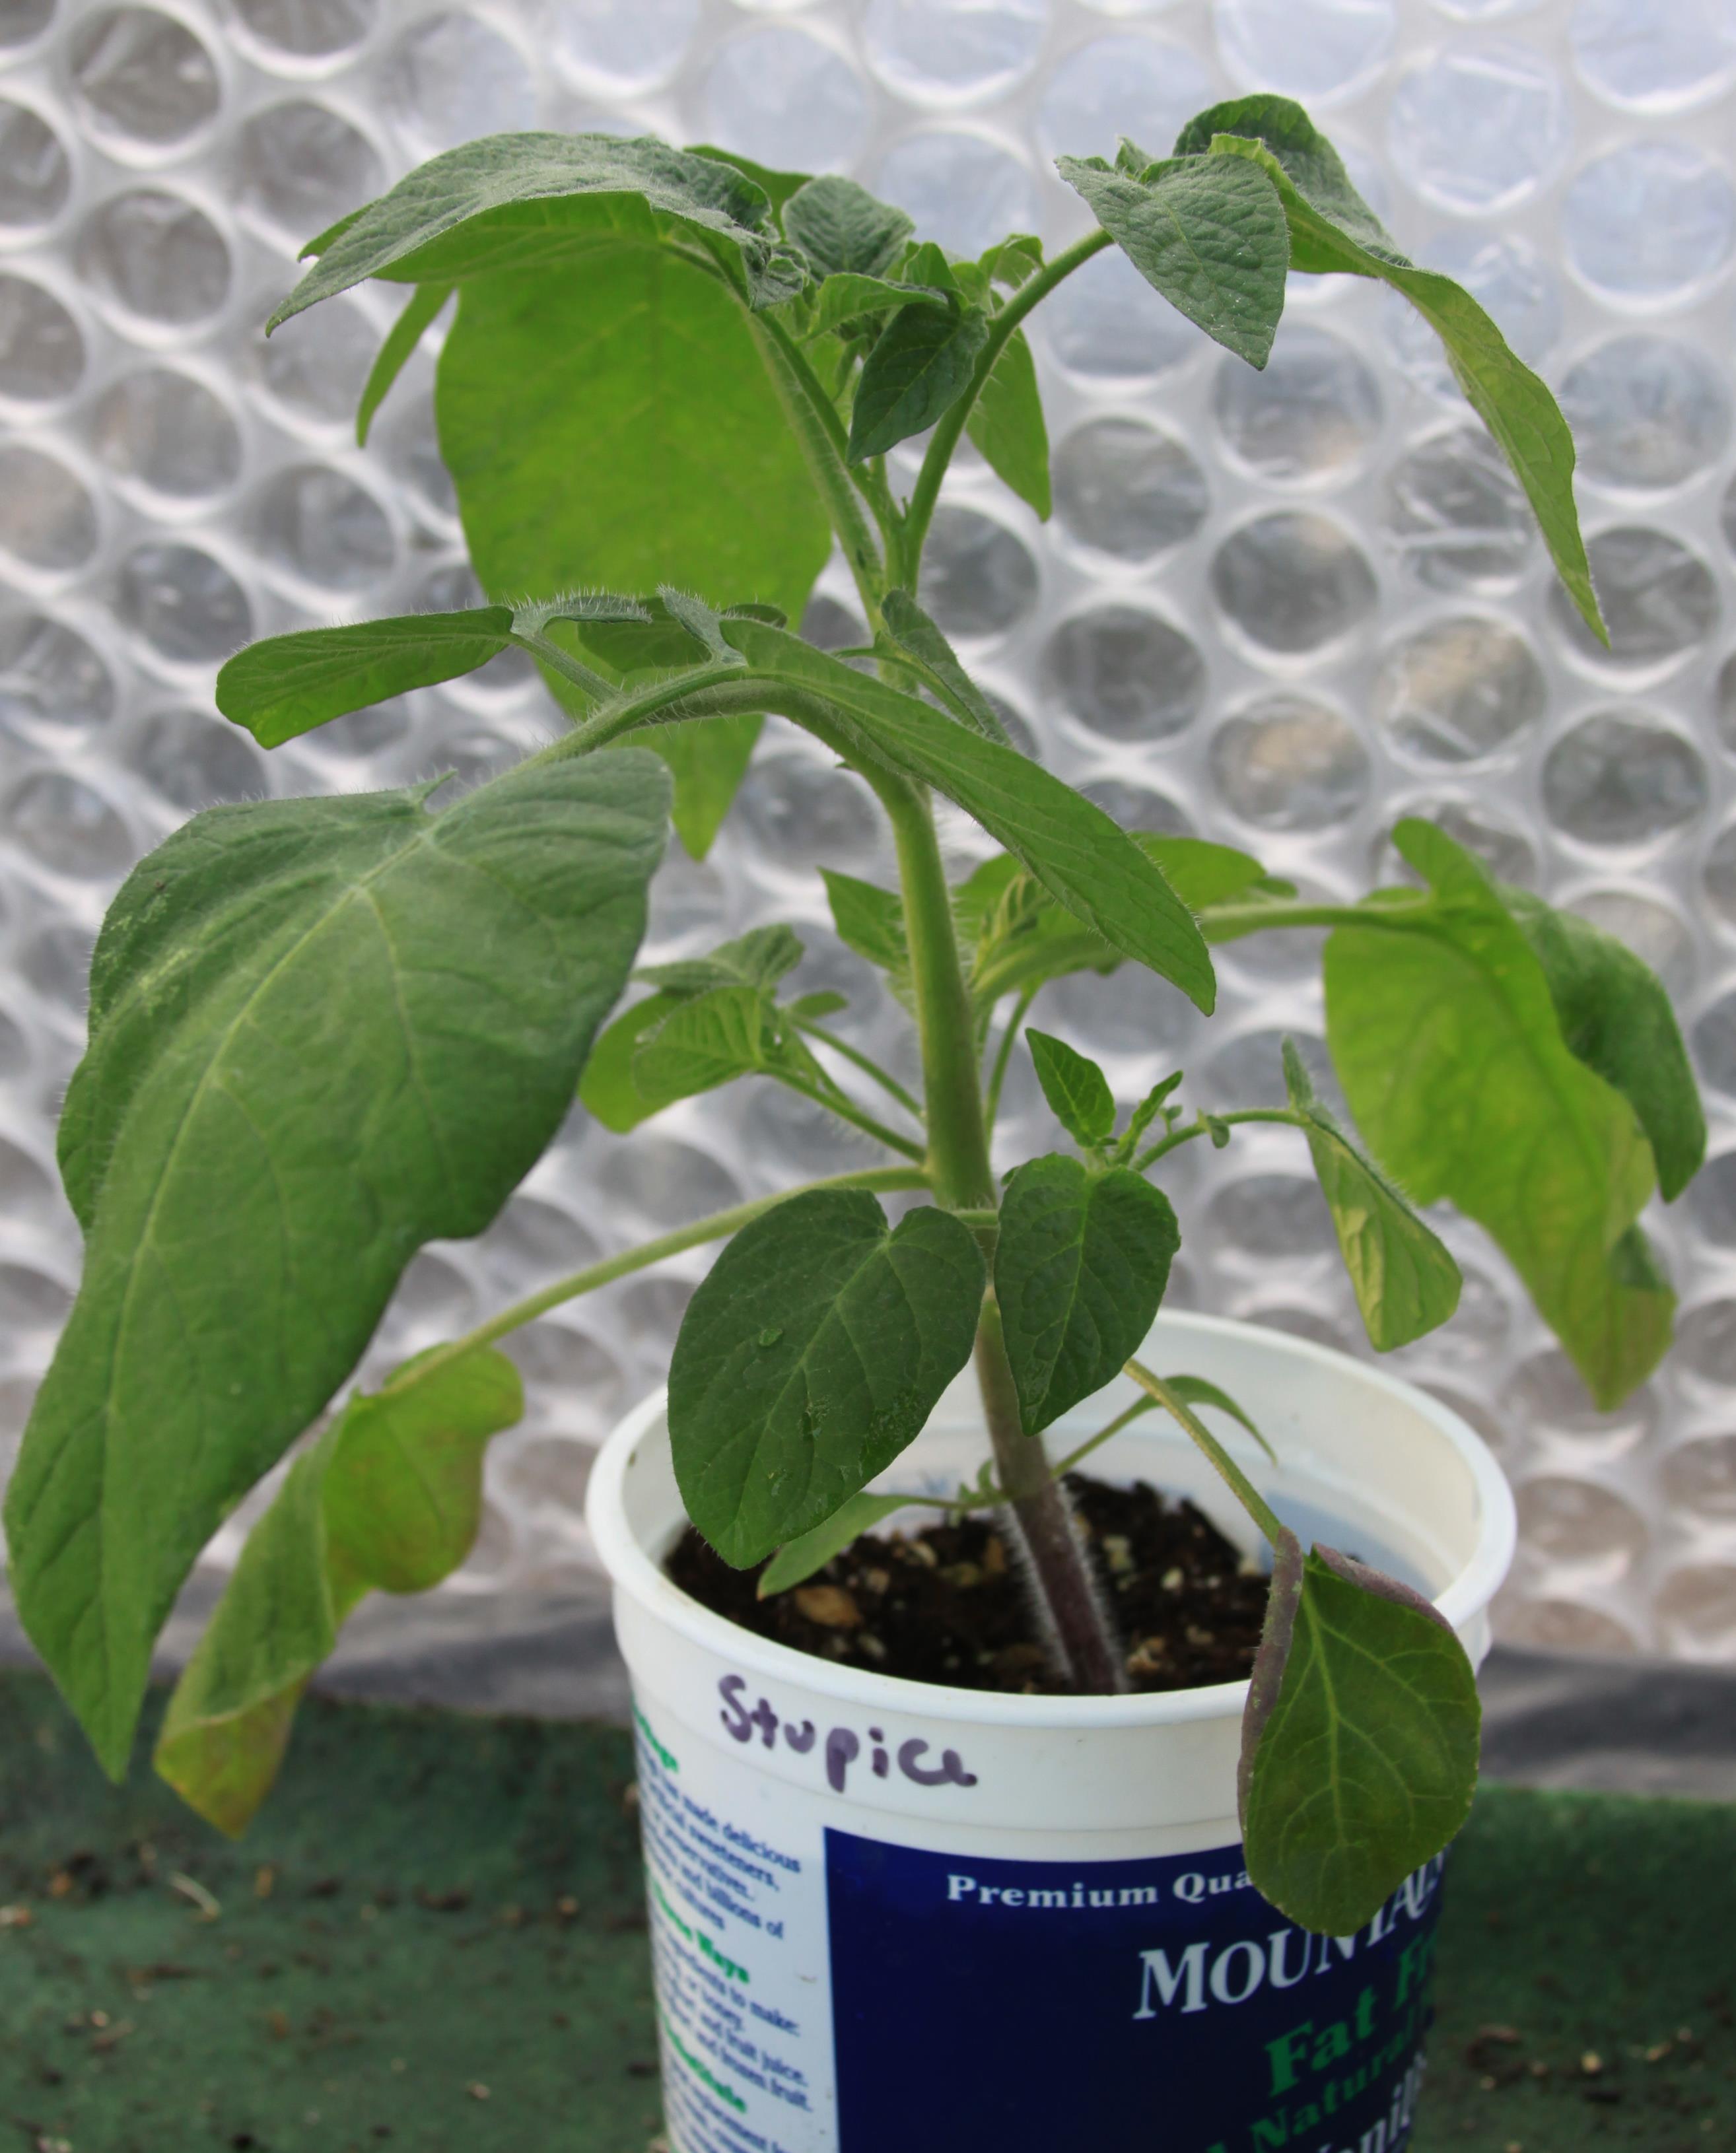
I plant the tomatoes in flats and place them under grow lights. Once the seedlings have at least one pair of true leaves, I transplant each one. I use an empty quart-size yogurt container for each. Whenever you re-pot a plant into a new container, it’s typical to use a slightly larger container.
But I find the tomato seedlings do great with this jump in pot size. In addition, it saves me time by not having to do multiple transplantings into large pots.
I have a small, unheated greenhouse so that’s where I move the seedlings to once they’re in their yogurt containers. I keep an eye on the temperatures. If necessary, I’ll cover the plants with a sheet of floating row cover. That will give them a little extra frost protection.
When temperatures stabilize in mid-May, I cover the beds they’ll be growing in with a sheet of red plastic mulch. It’s also known as SCRM tomato mulch). This accomplishes two things. It increases the soil temperature as well as the amount of light that is reflected up into the plants. You wouldn’t believe the difference in productivity one gets by using this plastic mulch! (see note at bottom of post)
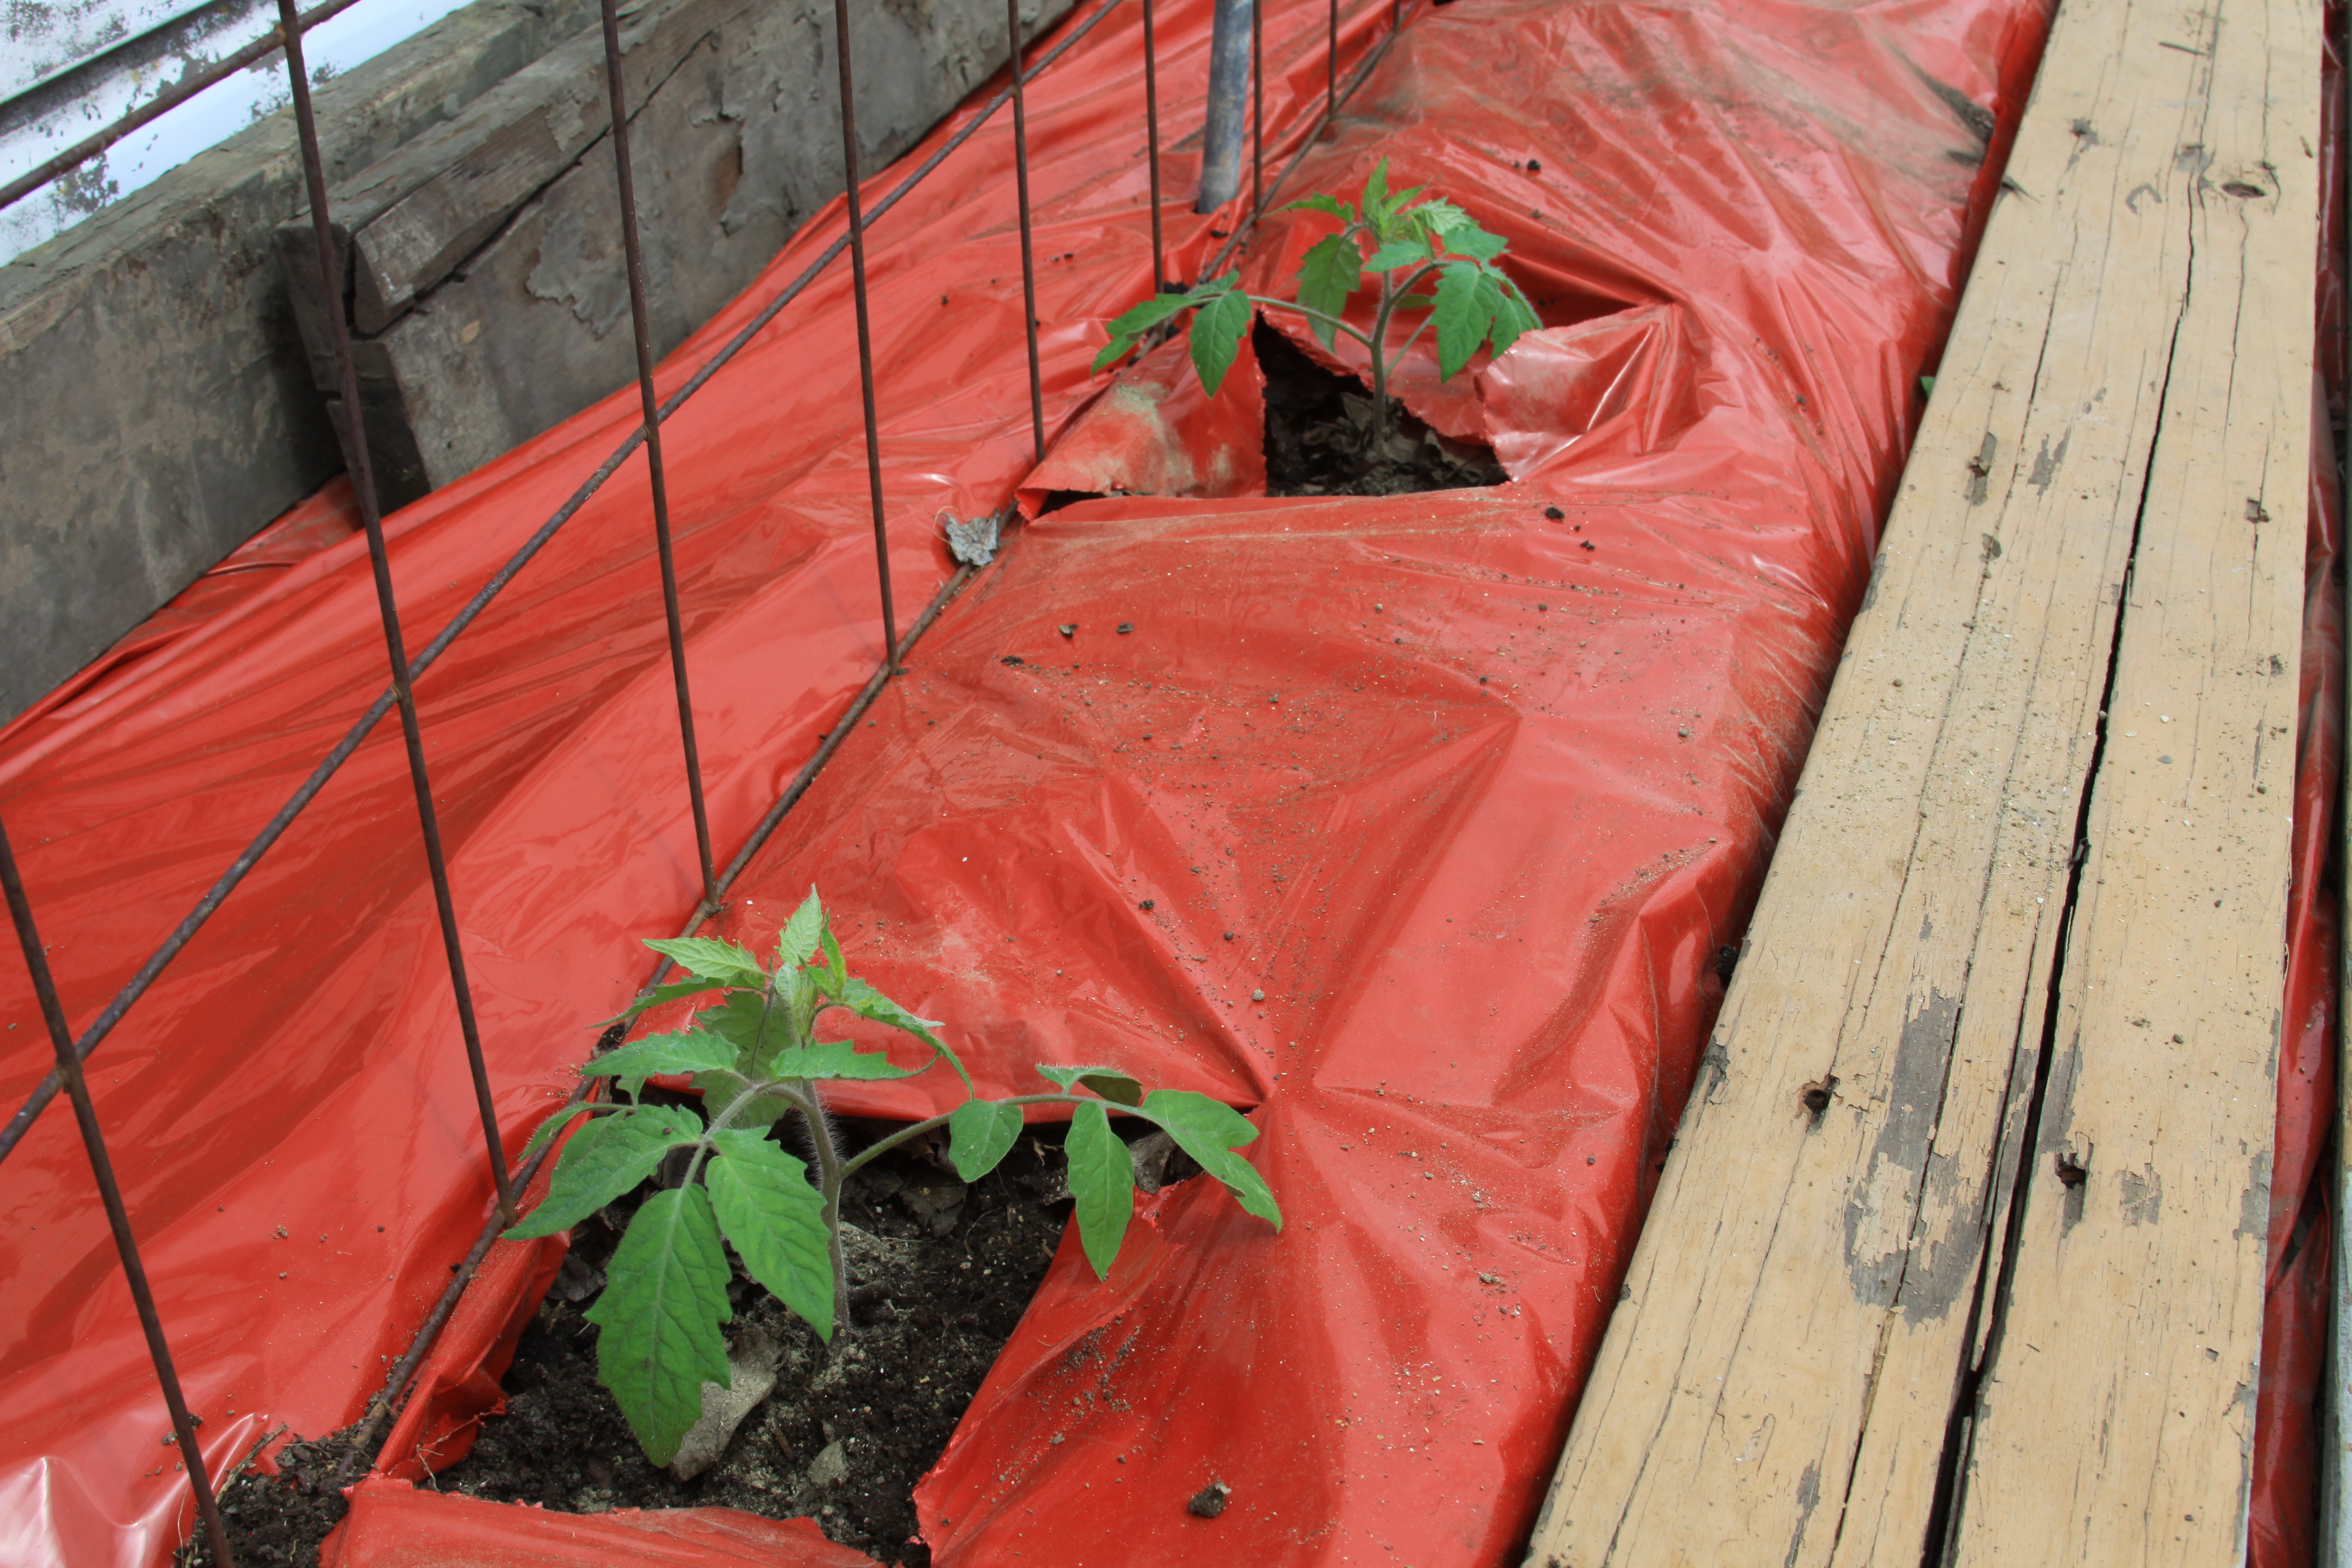
At planting time, I cut an “X” into the mulch for each plant. Then I plant the seedlings deeply to encourage additional root growth along the stems. I water them in well. After that, I cover the beds with floating row cover for about two weeks. That keeps the air around the plants warm.
You also better believe I watch the weather like a hawk for those first couple of weeks! There’s no point in letting a late frost ruin my carefully-tended seedlings, right?
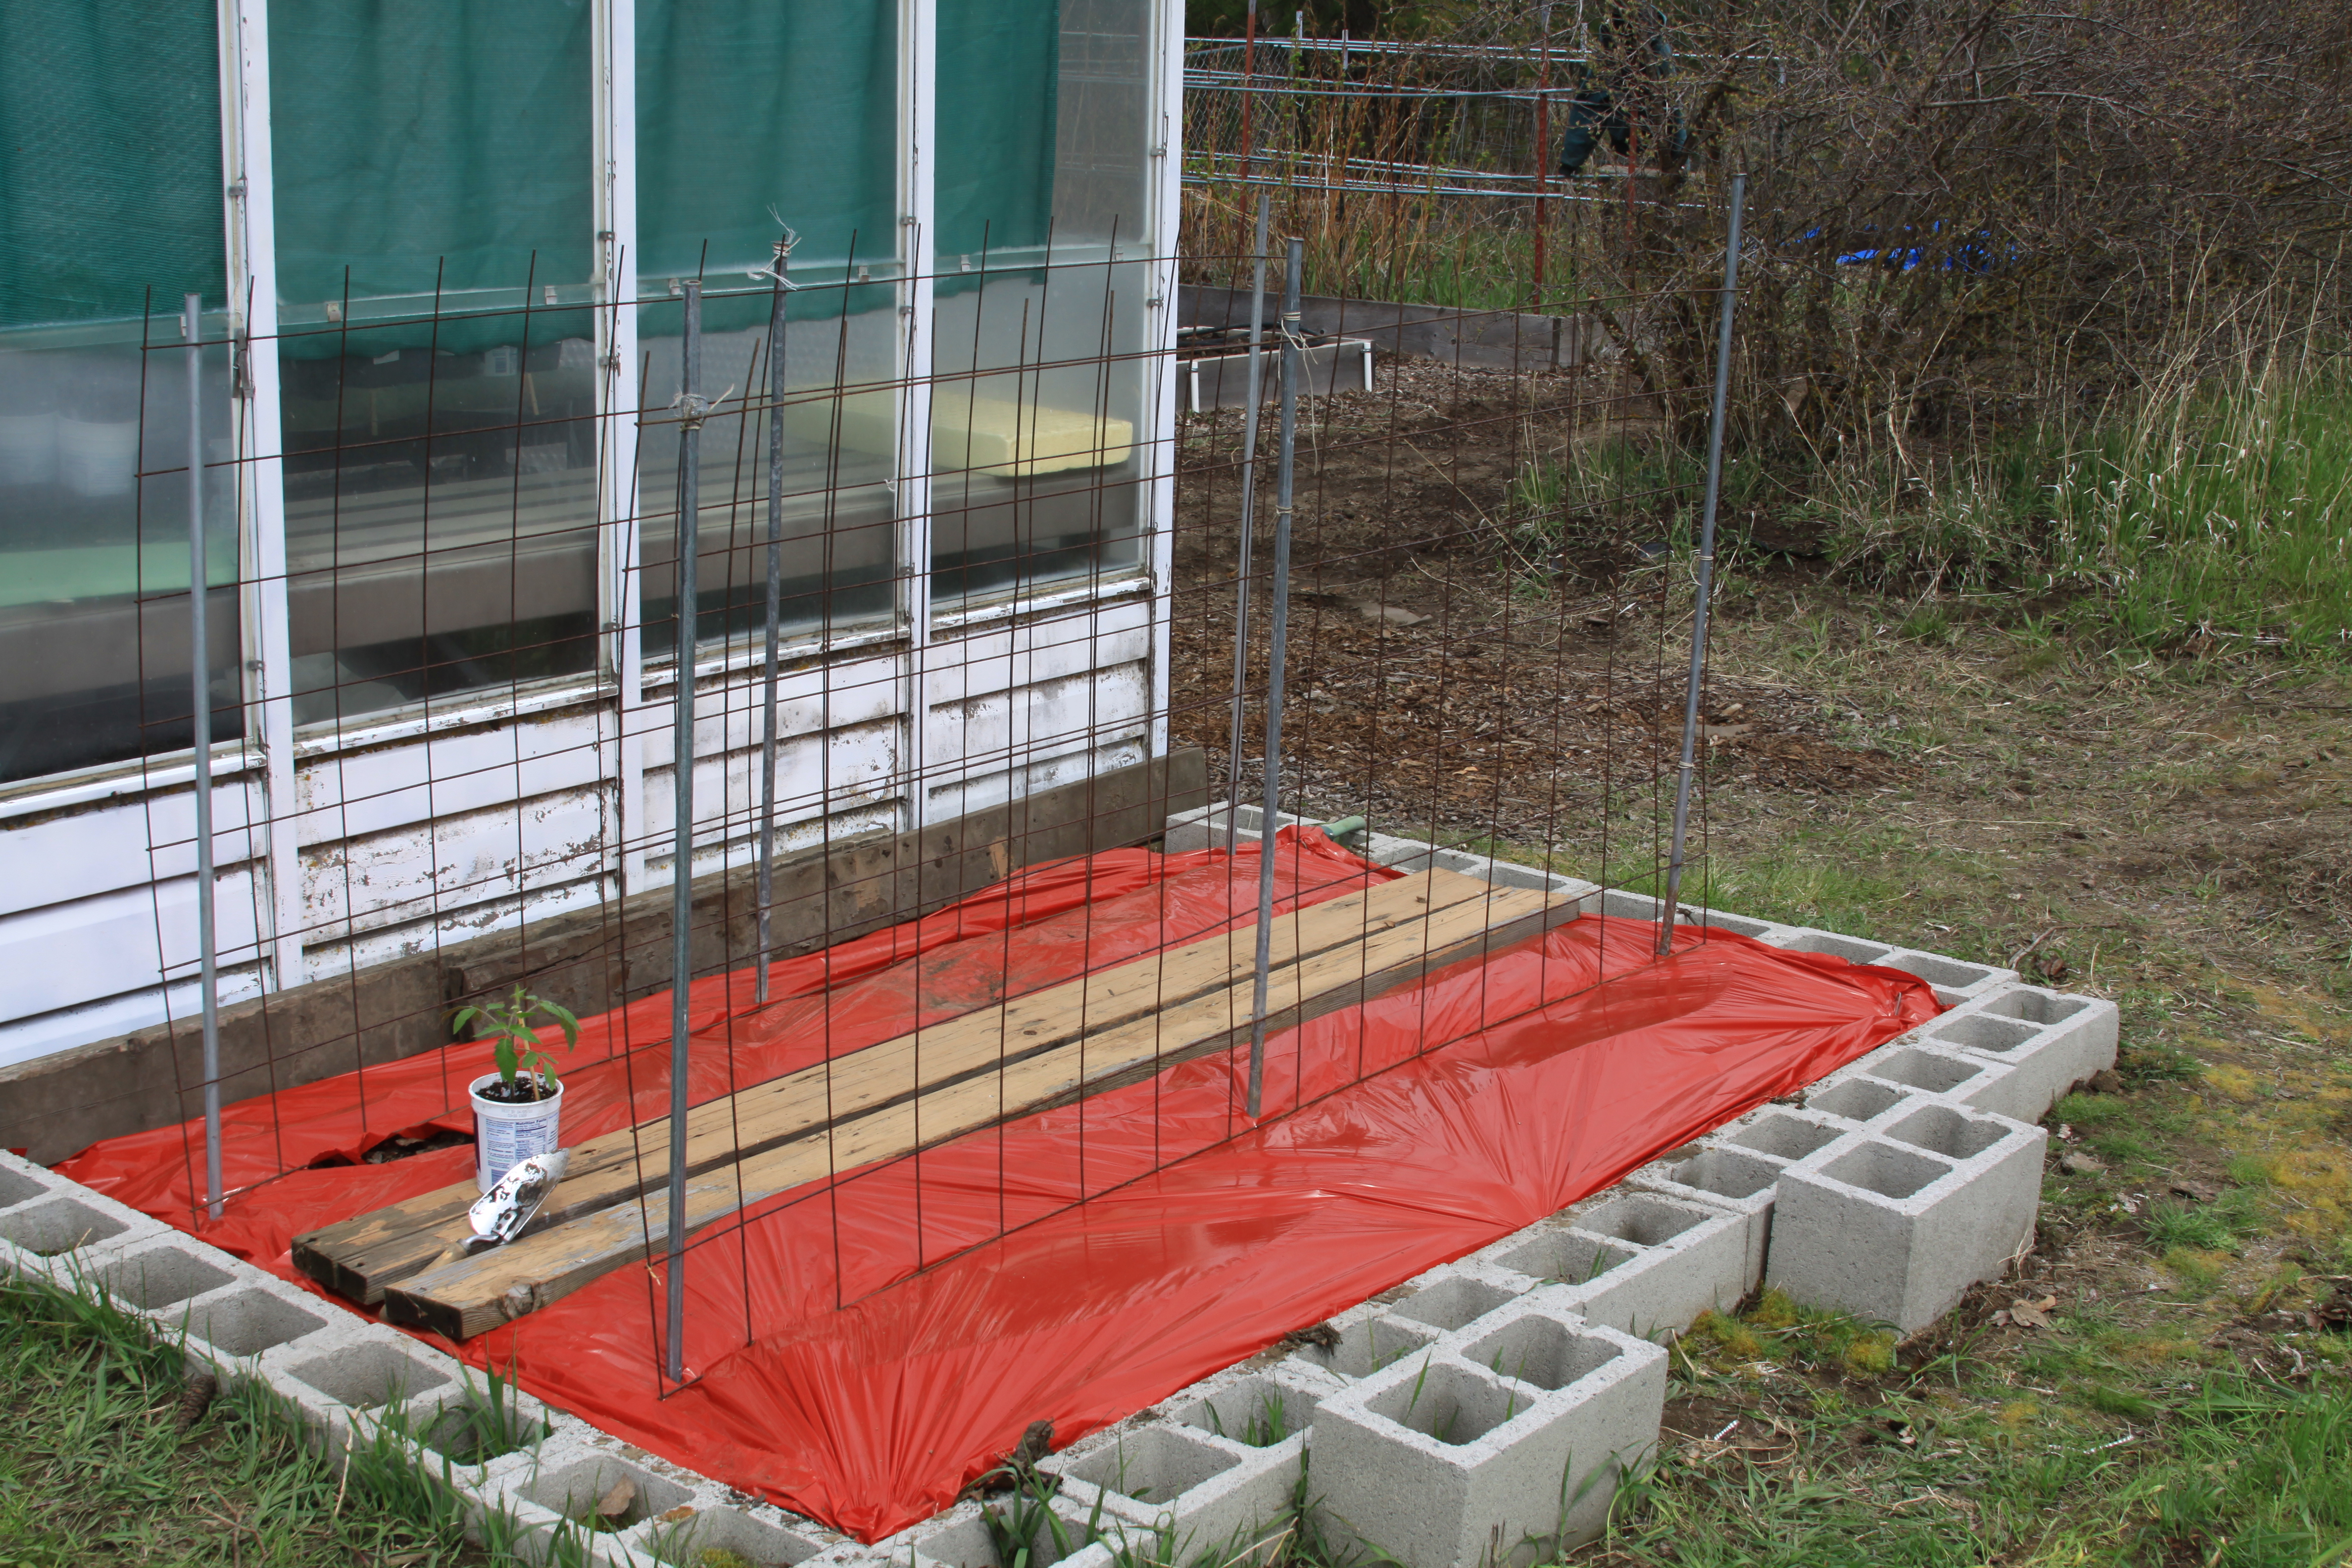
To support the plants, I don’t use tomato cages anymore. Instead, I plant the seedlings on either side of a vertical sheet of concrete reinforcing wire. Then I use a bit of twine to attach the plants to it. This works great and is much easier than using cages.
I hope this information will help you get your tomato plants off to a good start. Look for more tomato-growing (as well as other veggies) as we get into the garden season.
NOTE FROM MY LATER SELF! I later stopped using the red plastic mulch for two reasons. First of all, I discovered it doesn’t make much of a difference in the soil temperature. And secondly, I didn’t like the idea of promoting the extra use of plastic in the garden. I’ve grown warm-season crops without the use of red plastic mulch (or any type of plastic) for a few years now. And everything grows great. Just wanted you to know.